
Welcome back to 21 Days to Building a Better Ballplayer. Today’s task is to use throwing as a strength and conditioning tool for your shoulder rather than as a way to just warm up.
Throwing Program
Many ballplayers, coaches, and parents are looking for the perfect throwing program to be laid out in a step-by-step easy to follow guide. I’ve got bad news for you: there is no perfect throwing program and not every ballplayer will excel with a “standard” system. When it comes to the throwing portion of your program, you have to remember that no two baseball players are alike. Generalized throwing programs are over-designed with set distances, a specific number of throws, or a set time limit. Set distances with a set number of throws does not work for every ballplayer. While these types of programs may be good for the athlete returning from injury, this is impractical for the ballplayer with a healthy shoulder. To give a team or group of athletes a generalized program will only serve to hold them back, as many of their arms will actually enjoy throwing. Also, it may take longer for one athlete to “get loose” at a given distance compared to his teammates. And if we limit the number of throws, each athlete may not be able to take his own arm to its full potential on that day.
That being said, every player has to have a superb understanding of his own body and what it is capable of accomplishing during a given throwing session. Mastering this quality will be your best guide in determining the amount of time, throws, and distance you decide to throw. Your arm will let you know if you can stretch it out and increase the throwing distance or if it needs to have a lighter workload for that day. The more you throw, the better you will understand your arm and what it is capable of. And when you know what your arm is capable of, then you can really begin to see it flourish as you maximize its potential.
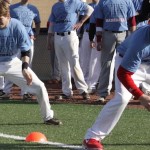
Even though there is not a perfectly set plan for throwing, athletes should always prepare their bodies prior to picking up a baseball. Athletes should begin each session with a dynamic warm-up, followed by specific shoulder work with tubing, and finally move into the throwing portion of their session. Never just pick up a ball and start throwing. You need to prime your body and shoulder for the task at hand.
Long Toss
Long toss has been a part of baseball for some considerable time, but at some point in the 1980s and 90s there was a decline in this approach to strengthening arms. In the last decade, long toss has made a steady comeback. And while there are still a few opponents to long toss, the benefits of a quality throwing program that include long toss distances beyond 120 feet are just too hard to ignore.
A good throwing program will help prepare your shoulder for the demands of throwing. Whether you are a pitcher who needs to increase his velocity or a position player looking to make a stronger throw to first, including long toss in your throwing program will help you build a strong and durable base for which your shoulder can flourish.
Long toss is considered throwing a baseball beyond 180 feet. Some would even say long toss is throwing 250 feet or more. Many standard throwing programs do not pass this mark (most are limited to 120-150 feet) because either the program was designed for a rehabbing ballplayer or their creators believe long toss is damaging to the arm. On the contrary, long toss will help to build arm strength and condition the shoulder to be more durable.
Putting it All Together
When it comes time to design your own throwing program, you need to remember a few things:
- Start with a dynamic warm-up.
- Use surgical tubing and incorporate more shoulder specific exercises after your general dynamic warm-up.
- Keep throwing loose and easy, focusing on proper form.
- If it’s a long toss day, be sure to use a crow-hop as you lengthen out your throws.
- After reaching your maximum distance for that day, use a pulldown phase as you walk back in toward your throwing partner. In other words, you should be making a full effort throw every 15-30 feet as you shorten the distance back up. The arm speed you worked up to at your maximum distance is now compressed into a shorter throw forcing you to get on top of the ball and deliver it on a straight line.
- At the end of a throwing session, pitchers might consider some flat ground work while position players can go into position specific drills (i.e. quick hands drills for infielders, ground ball approaches for outfielders, receiving/glove work for catchers).
Above all else, listen to your body and your arm. If you need a day off, take a day off. The goal is to develop arm strength and durability. Good luck!
 ARMing for Success
Want more information on how to set up and approach a throwing program? Check out ARMing for Success where you will learn a complete dynamic warm-up, 7 essential band exercises for the throwing shoulder, and how to set up your long toss program. You need a game plan when you hit the field, and ARMing for Success will give you the guidance you need. Check it out now!